Showing posts with label Technology. Show all posts

Saturday, 10 September 2016

List Of Phones That Will Not Support Whatsapp Anymore From 31st Dec 2016 ( See Here )


As part of effort in bringing better services to their
esteem customers, Whatsapp have decided to
announce December 31st 2016 as the end date of
supporting some types of phone.
Whatsapp which is the most popular messaging
application platform used by almost 90 percent of
smartphone users in the world will no longer support
some mobile devices as their planning to expand
their app features and add more security tools to
their App.
The affected mobile devices include:-
All Blackberry phones including blackberry 10
devices
All Symbian Phones Includes; Nokia 500, Nokia E6,
Nokia 5228, Nokia 5230, Nokia E63, Nokia 5233, Nokia
E66, Nokia 5235, Nokia 5250, Nokia E7, Nokia 5320,
Nokia E71, Nokia 5530, Nokia E72, Nokia 5630, Nokia
E73, Nokia 5700, Nokia E75, Nokia 5730, Nokia E90
Communicator, Nokia 5800, Nokia N76, Nokia 600,
Nokia N78, Nokia 603, Nokia N79, Nokia 6110, Nokia
N8, Nokia 6120, Nokia N81, Nokia 6121, Nokia N81 8
GB, Nokia 6124,Nokia N82,Nokia 6210,Nokia N85,
Nokia 6220, Nokia N86 8 MP, Nokia 6290, Nokia N95,
Nokia 6650 Fold, Nokia N95 8 GB, Nokia 6700, Nokia
6710 Navigator, Nokia N96, Nokia 6720, Nokia N97,
Nokia 6730, Nokia N97 mini, Nokia 6760 Slide, Nokia
X5-01, Nokia 6790 Surge, Nokia X6, Nokia 700, Nokia
X7, Nokia 701, Samsung GT-i8510, Nokia 808
PureView, Samsung GT-l7110, Nokia C5, Samsung
i8910 Omnia HD, Nokia C5-03, Samsung SGH-G810,
Nokia C6, Samsung SGH-iNNN, Nokia C7, Samsung
SGH-L870, Nokia E5, Sony Ericsson Satio, Nokia E51,
Sony Ericsson Vivaz, Nokia E52, Sony Ericsson Vivaz
Pro and Nokia E55.
All Nokia S40 Phones Includes; Nokia Asha 201,
Nokia Asha 300, Nokia Asha 302, okia Asha 303,
Nokia Asha 306, Nokia Asha 311,Nokia C3-00, Nokia
C3-01, Nokia X2-00, Nokia X2-01 and Nokia
X3-02,Window phones 7.1,iPhone 3GS/iOS 6,Andriod
2.1 and Andriod 2.2
The company added through its blog post that
despite it was a tough decision for them to make,
but still the right one in order to provide better
service and better ways to keep in touch with your
family, friends and loved ones using Whatsapp.
Therefore if your phone falls within the stated range,
you are advised to either upgrade to the newer
version of Andriod, iPhone, Window or get a newer
ones before the due date.

Saturday, 30 July 2016

Iphone Sensor might be Fake - See a surprisingly long list of body parts will open a iPhone Touch ID sensor


What do your nose, the heel of your foot and
left nipple all have in common? Well,
according to this Reddit thread, they will all
work on an Apple Touch ID sensor. The same
can’t be said for right nipples, unfortunately.
Highly reputable Reddit source “
A_Gigantic_Potato ” published his
“comprehensive” list of different body parts
that will work with a Touch ID sensor. For a
part that was only meant to recognise
fingerprints, it turns out that the Touch ID
sensor is surprisingly versatile.
Here’s the complete list of body parts My
Friend has tested thus far:
Parts that do work:
• Fingers
• Palm of hand
• Big toe
• Index(?) toe
• Pinky toe
• “Palm” of foot
• Nose (very difficult)
• Back of index finger (very difficult)
• Heel of foot (works better than thumb imo)
• Left nipple (right refuses to cooperate)
Parts that do not work:
• Forearm
• Knee (That round bit of your ankle
• Belly
• Earlobes
• Eyelid
• Thigh
• Right and left Testicle
• Tip of Penis (underside)
• Tip of Penis (top side, although it’s
interesting to note that this generated the
best results although the results seemed to
deteriorate and got more errors as it got
flaccid)
A Friend conducted some spot testing with
my own iPhone, and I can vouch for the
validity of the results on big toe and that
round bit of your ankle. HR regulations
prevent me from conducting a complete test
at my desk.
Interestingly, the fingerprint sensor on a
Galaxy S7 doesn’t fare nearly as well. No
matter which angle I used, I couldn’t get it to
recognise my big toe.
is this a Bug or feature?

Friday, 29 July 2016

Xiaomi Has Released Its First Ever Laptop Which Weighs Lighter Than Magazine


Xiaomi just lunched her own laptop MI
Notebook Air. And it came as shocker as its
their first ever laptop. According to Xiaomi,
the 13.3-inch Notebook Air is 13 percent
thinner than Apple’s popular notebook, and
11 percent smaller. Lighter than a magazine!
Isn't that amazing?
Mi Notebook Air has a full-sized keyboard w
backlit keys, all the ports you need, and the
most interesting aspects is that it weighs
only 1.28kg! Full-HD display, edge-to-edge
glass protection, & a full metal body.
Review of the specifications
Mi Notebook Air 13.3"
- Intel Core i5 processor, runs Windows 10
Home
- 8GB DDR4 RAM + 256GB PCIe SSD,
expandable SSD slot
- NVIDIA GeForce 940MX dedicated graphics
card
- 9.5-hour battery, 50% charge in 30min
- Lightweight full metal body, weighs just
1.28kg
- Elegant logoless design, personalize with
stickers
- Supports Mi Cloud Sync and Mi Band
unlocking
- Priced at (Approx. $750)
Mi Notebook Air 12.5"
- Sized like a magazine, just 12.9mm thin
- Full metal body, only weighs 1.07kg
- Intel Core M3 processor, 11.5-hour battery
- 4GB RAM + 128GB SATA SSD, expandable
SSD slot
- 1080p FHD screen, edge-to-edge protective
glass
- AKG custom dual speakers, Dolby digital
surround sound
- Priced at(Approx. $525)
Apple should be expecting some serious
competition soon.

Tuesday, 26 July 2016

Infinix Hot S Said To Be Launched Within 24hours - Get Ready!


This is a great news! Infinix Hot S X521 will soon be
launched in the 24HOURs and I know everybody are
already waiting to get this device that is coming up in
two variants or versions; the 2GB RAM and 3GB RAM
versions and with huge specifications.
The phone features VR technology and fingerprint
scanner amd is said to be coming with Android 7.0
Nougat version but it currently coming with
Marshmallow 6.0 version and is going to be powered by
the MediaTek Helio P10 octa-core 64 bit processor with
an amazing 424 PPi for cristal clear display.

Saturday, 23 July 2016

ntel unveils fastest router in Nigeria, offers free browsing

ntel, Nigeria’s most advanced 4G/LTE network provider,
has launched its internet router across its outlets in
Lagos and Abuja, Nigeria’s capital. The ZTE Router
supports up to 64 concurrent Wi-Fi connections and 4
LAN ports connections
Subscribers who purchase the router alongside one of
ntel’s unlimited data plans of N10,000/monthly; N3,000/
weekly and N1,000/two days, will be treated to a whole
new internet experience.

Kamar Abass, CEO
By Taboola Sponsored Links
ntel unveils fastest router in Nigeria, offers free
browsing
ON July 23, 2016 3:42 PM / IN Technology /
Comments
ntel, Nigeria’s most advanced 4G/LTE network provider,
has launched its internet router across its outlets in
Lagos and Abuja, Nigeria’s capital. The ZTE Router
supports up to 64 concurrent Wi-Fi connections and 4
LAN ports connections
Subscribers who purchase the router alongside one of
ntel’s unlimited data plans of N10,000/monthly; N3,000/
weekly and N1,000/two days, will be treated to a whole
new internet experience.
As part of activities to mark the sale of its superfast
routers, ntel is offering visitors to its stores an
opportunity to experience its superfast internet speed at
three of its outlets in the two major cities where they
have coverage.
The outlets are 134, Aminu Kano Crescent, Wuse II,
Abuja; main lobby, Transcorp Hilton Hotel, Abuja and
Alfred Rewane Road (Formerly Kingsway Road) opposite
Ikoyi registry, Lagos.
Speaking on the router, Kamar Abass, CEO of ntel said
"This is the ideal router for households as well as small
and medium scale businesses and other organisations
who require superfast internet service. Our routers
which are Cat 6 with 4 x 2 MiMo will not only guarantee
superfast internet access but can serve up to 64 multiple
users at the same time. For data hungry Nigerians
looking for superfast internet speeds up to 230mbps
over a 4G/LTE connection, this is the device for them.”
The router operates on 2.4 GHz for better wall-
penetration capabilities and 5 GHz for faster throughput
and lower interference. The powerful gadget also
supports gigabit wired connections so that it is possible
to copy files over a LAN at a speed higher than 80 MB/
s.
The ZTE MF286 is similar in size to a traditional wireless
router, but its ability to: deliver speeds of up to 230
Mbps using the 4x2 MIMO technology; operate on dual
SSIDs 2.4 and 5GHz for better wall-penetration
capabilities and lower interference respectively; function
in active mode for 6 to 8 hours using its 3,000mAh
battery and support file sharing among users on the
same wi-fi network via its USB port —makes it special. It
has an exclusive design, with a main body enhanced
with graceful curves, to improve the visual effect and
feel.

Friday, 15 July 2016

How To Flash Your Blackberry Phone Completely With This Software

Flashing, Serviceing and unlocking software
for all Blackberry mobiles free download.
Blackberry cell phones flashing tool latest
version is avail to download directly from
this blog. If you want to flash your
Blackberry mobiles or want to install custom
firmware on your Blackberry cell phone then
this flashing tool is most helpful for you.
Just download this tool from the given link
and iqnstall this tool on your computer to
enjoy its latest features at your home.
This flashing software for Blackberry devices
is completely free and small size for
downloading. So you can easily download
this tool in couple of minutes. This file is
compressed in a zip folder, so dont forgot to
extrat this file after downloading.


You can download Blackberry mobiles
flashing tool zip file from the link below.
Click the link to start downloading now.
Download Blackberry Flash Tool

How to Flash Nokia Phone With Pc

Phoenix service software is a free and
amazing tool for flashing Nokia phones using
a Usb data cable. You can flash easily your
VNokia phone using phoenix service software
free tool. It is completey free and without
waiting to download.

Download phoenix service software from here
and install it on your computer,u connect your
Uphone to computer using a Usb data cable,
Iichoose flash file for your selected phone and
start flashing your phone.
Before starting flashing your Nokia phone
don,t forgot to get backup of your important
data, Because after flashing your Nokia
phones your all important data will deleted
and your can,t get it again.
Phoenix service software 2014/15/16 you can
free download from the given download link,
which is available at the end of the post. The
provided download link is free and risk free,
So you can download phoenix service
software by clicking on the download link
below.
Download
Phoenix Service Software 2011,
2012, 2013, 2014, 2015, 2016
Phoenix service software 2016 latest version
is not recently released, When Phoenix
Service Software latest update version 2015
is released you can download updated
version of Phoenix service software from
here.

Sunday, 10 July 2016

Gionee M6 Coming Soon With 4GB RAM And Fingerprint Scanner


Without a doubt, the Gionee M5 is
one of the hottest device in the
market right now. To continue the
streak, Gionee is bringing Gionee M6,
a Gionee M5 upgrade real soon.
Gionee M6 , Gionee's next device has
already passed a certification test by
TENAA and is set to launch on July
26th.
Gionee M6 Rumored Specs
5.5-inch full HD (1920 ×
1080p) AMOLED display
Dimensions: 152.3 × 75.3 ×
8.4 mm
Weight :185 grams
1.8GHz octa-core
snapdragon 652 processor
Android 6.0 Marshmallow
4GB RAM
32GB internal storage
13-megapixel back camera
with LED flash
8- megapixel front camera
Fingerprint scanner
Dual SIM, 4G with VoLTE,
Bluetooth, USB, WiFi, and
GPS
5000mAh battery
One thing I like about the Gionee M6
is the drop in weight, the Gionee M5
weighs 215grams which is a bit too
heavy for me.
The reduced battery capacity is most
likely responsible for the reduced
weight, the Gionee M5 had a battery
capacity of 6020mah.

Wednesday, 6 July 2016

Few Reasons Why You Should Not Install Flash Keyboard On Your Android Phone

Android users are surrounded with several
apps to download from both google
playstore and other sources. There are
millions of applications for almost every
category of human beings. There are apps
with different tasks and functions and one of
the popular apps are keyboard apps as we
need them for typing.


Flash Keyboard is among the most popular
applications in Google playstore as it has
recorded over 50 million downloads and was
sometime ranked as the 11th most popular
app on playstore but unknowingly to users,
the app is full of malware and not safe for
users. This was recently discovered by a UK-
based cyber-security firm by name Pentest .
They found the keyboard to be asking for
“excessive permissions”, displaying infected
ads, asking for admin privileges in order to
make uninstall very difficult, monitoring user
behavior, and then sending data to servers
in China without the user’s consent.
Reasons Why Flash Keyboard App Is A
Malware
According to Pentest
1. The app requires unwanted access to a
phone’s Bluetooth connection, geo-location
feature, or Wi-Fi status which is not ideal for
a keyboard app.
2. The app always ask for access to kill
background processes, read SMS messages,
show system overlays, or remove download
notifications. Pentest says there are no
reasons for a keyboard app to require these
intrusive permissions.
3. Flash Keyboard was asking for device
admin permissions, and was using these
powers to take over the smartphone’s lock
screen and show ads even if users opted
out.
4. Flash Keyboard secretly transfers data to
secret servers located in China and other
foreign countries. The app transmitted
sensitive user data including the owner’s
email address, device manufacturer, model
number, IMEI and Android version to what it
believes to be analytics servers in the US,
Netherlands and China.
5. Flash Keyboard sends details of the
currently connected Wi-Fi network and
others in the proximity, the identity of the
mobile network being used and GPS
coordinates that are accurate to within three
meters of the user.
So you have seen it. If you noticed, the
owners of the app are always running ads on
Facebook and Google adword to promote it
but seeing what is on ground now, i think
you should think twice before downloading
the app. Of course there are other nice and
amazing android keyboard you should try.
For instance SwiftKey, Google keyboard and
Gokeyboard are all nice.
Please hit the SHARE BUTTONs to share this
with your friends so that they will be aware
of this malware pending the time the app
developers fixes it. Thank you.

Tuesday, 5 July 2016

First Driverless Car in Nigeria


Much has been said of driverless cars which
can be additionally called self-driven
motors; the sector automobile technology is
gradually moving in the route of that
perspective as countries like Germany, US
and China had already check-runned some
driverless cars on the street.
I was amazed at the same time as a Twitter/
IG customer shared the pics of first
driverless vehicle in Nigeria as end up
discovered in Lagos due to the fact I wasn't
waiting for the car in Nigeria too brief. What
he said;
'Saw it live today, the first #driverless car in
Nigeria.

Monday, 4 July 2016

How To Change Imei Of All Android Phones ...


This is a detailed tutorial on how to change any
android device imei to blackberry imei or free data
imei number, and tweak your android to enjoy lots of
imei freebies from Mtn, Etisalat and Airtel.

Am sure you must have seen various ways and
methods to change android imei, But let me assure
you that no matter the type of android device, this
tutorial is all what you need, because you are going to
know how to change your android imei in various ways
just following the steps below.
Lets get started.
Firstly, lets talk about the benefits involved in
changing your android phone’s imei to that of a
blackberry or other imei.
You’ll be able to use Glo Bis On your Android
device after Changing Imei.
Using the Glo Bis of N1,000 for 3GB for a month.
Free data that ranges from 2GB – 3GB from Mtn ,
Airtel and Etisalat by changing to a specific imei
number..
We have different ways of changing android devices
imei using various types of applications and tools but
one of the most efficient way is using the mobile uncle
app.
Download Mobile Uncle Tools from Google play Store
Here

Download the English Version here

Lets get started with the steps:
STEP 1:
How To Change imei of Android Phones Using Mobile
Uncle
Lets see the compatible android devices that mobile
uncle tools works on
Mtk6589 device
Mtk6582 device
MTK65XX devices
Quad Core Mediatek phones
Octa Core Mediatek phones
Requirement For Changing your Android Imei
Your Android device must be rooted.
You can root your android device with kingroot.
After successful downloading mobile uncle tools.
Install and launch mobile uncle.
If you get pop-up requesting root permissions
then,just grant the request and continue below
First create backup of current IMEI by choosing IMEI
Backup Restore (MTK) and then select Backup IMEI to
desired path.
Tap on Engineer
Mode>Engineer Mode (MTK) and then swipe your
fingers to the left to scroll to right and going to
Connectivity Tab.
Tap on CDS Information and open
Radio Information > Phone 1 or Phone 2 (This simply
means Sim 1 or Sim 2, whichever you want to change
IMEI)
Now you can see a AT+ written at the top, tap the
end and depending on your sim,
add the line: EGMR=1,7,”NEW SIM 1 IMEI”
or EGMR=1,10,”NEW SIM 2 IMEI” and tap on send
Command.
Now you’re done. You just have to restart the phone
and then to check your android phone’s new
IMEI,dial *#06#.
Congrats,you’ve successfully changed your android
phones imei!
STEP2:
How To Change Android Phone Imei to Blackberry Imei
Firstly, we need to generate a blackberry imei to put
inplace of the android imei.

Download BlackBerry Imei Generator here
After downloading,extract the file and double
Click on GIPv4.1
Click on generate imei. copy down imei.
Now launch mobile uncle tool, open the app, and
navigate to Engineer Mode
In the next screen, click on Engineer Mode (MTK)
slide the window to Connectivity just like we did
before and then click on CDS Information
After that,Click on Radio Information
If you are using a dual Sim android phone, Phone 1
represents your Sim 1 and Phone 2 represents your
Sim2. So choose the slot you want to swap imei with
that of blackberry. Most guys choose sim1 though.
After choosing the desired slot, click on the (AT+)
type in a word and then clear the word you typed.
After clearing it, a dialogue box will
Open click on AT+EGMR=1,7,””
In between (“”) type in the imei which you
generated.
Check if the numbers are same and equal
Then, click on SEND AT COMMAND if you receive a
message saying AT command sent and
successful,you’re successful!
All you have to do now is to reboot your phone that all
now you can rock your new imei and browse with it
like a blackberry phone. but make sure you backup
your previous Imei, I suggest writing it down on a
Piece of Paper incase anything goes wrong so that
you can quickly change it back.
And that’s it for changing your android phone’s imei
STEP3:
This steps involves another way to change your
Android device Imei using the Terminal Emulator App.
How To change Android Device Imei using Terminal
Emulator
Firstly, you need to download terminal emulator on
your android device.
Download Terminal emulator from Google play store here
Requirement:
A Rooted Android Device
Lets get started
How to Change IMEI Number with Terminal Emulator of
Android Phone-Tab For Single Sim Device
Open Android Terminal Emulator
Type SU then press ENTER button to get Superuser
(root) permission
After that, type this command then
press ENTER button echo ?AT +EGMR=1,7,?
IMEI_NUMBER?? >/dev/ pttycmd1 or echo AT
+EGMR=1*7*IMEI_1 >/dev/ pttycmd1
That’s it for single sim android phones. Now,for Dual
Sim Phones
Open android terminal emulator.
Type SU and then press ENTER
Type following command then Eneter echo ?AT
+EGMR=1,7, ?IMEI_NUMBER? ? >/ dev/ pttycmd1
If your phone is dual-sim, type this command then
ENTER echo ?AT +EGMR=1,10, ?IMEI_NUMBER? ? >/
dev/pttycmd1
Finally, The above steps are 100% tested and working
ways to successfully change your android imei.
NOTE: Once you flash or factory resets your device, the
imei you changed would restore back to default. And
you have to carry out all the process above to change
the imei number.

That's All
Drop your Comment we are ready to help you

BlackBerry Phones Recovery Steps


How to to recover a BlackBerry smartphone after all
other possible means of recovery have been
exhausted.
* Remove the battery from the BlackBerry
smartphone.
* Open a web browser on a PC (Mozilla Firefox is
recommended ) and navigate to http://hovatek.com/
redirect.php?link=htt…com/update (Ensure to click
‘Skip Ad’ to proceed)
* Click Check for Updates.
* Wait for the Device Connection dialog box to
appear with no result for pin.
* Connect the BlackBerry smartphone to
the computer
with the battery removed.
* Press Ok when the PIN field is populated with the
BlackBerry smartphones PIN number or PIN-
Unknown is displayed.
Note: Some BlackBerry smartphones may be in a
reset loop, which will cause the field to populate and
depopulate.
This is not an issue; pressing OK when the
PIN field is populated will allow the process to move
forward.
* Select the appropriate version of BlackBerry
Device Software and applications for the BlackBerry
smartphone, click Next.
* At the Review the following options before you
begin dialog, insert the battery without unplugging
the
USB cable.
* Press Install update.

Saturday, 2 July 2016

Tips On how to Unroot Android Phone or Tab Using SuperSu


First things first, when doing anything to your Android
device, make sure you back up your data. Unrooting will
wipe data from your phone, so back up anything you
want to keep hold of into cloud storage or onto an SD
card/PC.
How to unroot Android: Using
SuperSU
By far the simplest way to unroot your Android handset,
SuperSU is a free-to-download app for rooted devices.
Here’s how to unroot your phone via SuperSU.
How to unroot Android: Using ES File
Explorer
I’m not sure if I’ve spoken about how good ES File
Explorer is for a file explorer app, but it’s great. So
great, in fact, that you can unroot your phone using it if
you know what you’re looking for. Thankfully, with this
little guide, you’ll know exactly what to do.
Home

Google
› Google
Android ›
How to unroot Android: Two
incredibly simple ways to
unroot your Android phone
How to unroot Android: Two
incredibly simple ways to
unroot your Android phone
Google Android

Download and install SuperSU from the Google Play
Store . 1
Launch SuperSU and go to the “Settings” tab. 2
Scroll down until you see “Full unroot”. Tap it. 3
You’ll be asked to confirm that you want to completely
unroot your device – tap continue. 4
Once done, SuperSU will close automatically. Restart
your Android device. 5
When your device has booted back up, uninstall
SuperSU and you’ll be the proud owner of one
completely unrooted Android device.

HTC Windows Phone 8S- Hard Reset Steps


1. On the Start screen, slide to the left.
2. Tap Settings > About (informations)
3. Tap Reset your phone, and then tap Yes .
Second method:
1. From the Main Menu choose Settings.
2. Then tap About and select Reset your phone.
3. Confirm the whole operation tappind Yes.
4. Turn off your phone.
5. Press and hold the Volume Down button, and
then briefly press the Power button. Release the
Volume Down button when you see an icon on
the screen.
6. Then press the following hardware buttons in this
sequence: Volume Up > Volume Down > Power >
Volume Down
The device will now start the reset process. Please
allow a couple of minutes for it to complete.

That's all

HTC Windows Phone 8S - How to Hard Reset


1. On the Start screen, slide to the left.
2. Tap Settings > About (informations)
3. Tap Reset your phone, and then tap Yes .
Second method:
1. From the Main Menu choose Settings.
2. Then tap About and select Reset your phone.
3. Confirm the whole operation tappind Yes.
4. Turn off your phone.
5. Press and hold the Volume Down button, and
then briefly press the Power button. Release the
Volume Down button when you see an icon on
the screen.
6. Then press the following hardware buttons in this
sequence: Volume Up > Volume Down > Power >
Volume Down
The device will now start the reset process. Please
allow a couple of minutes for it to complete.

That's all

How to Upgrade Android Phone Version from 2.3 to Version 4.0 Without Pc

How to Upgrade an Android Device from Version
2.3 to 4.0 Manually
Android smartphones are great devices for a myriad of
different reasons. One of the things that makes them
so great is their software. Upgrades usually occur
periodically, either to fix bugs or introduce new
interfaces and/or updates. Upgrading your phone to
4.0 is a great way to access new set ups in the
software, and doesn't take too long to do.
STEP 1


2
3
4
5
6
7
1
2
3
4
How to Upgrade an Android Device from Version
2.3 to 4.0 Manually
Android smartphones are great devices for a myriad of
different reasons. One of the things that makes them
so great is their software. Upgrades usually occur
periodically, either to fix bugs or introduce new
interfaces and/or updates. Upgrading your phone to
4.0 is a great way to access new set ups in the
software, and doesn't take too long to do.
Method One of Two:
Update Over the Air (OTA)
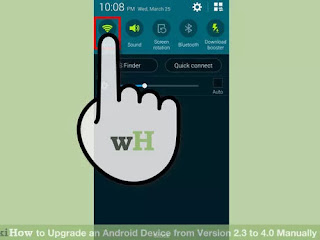
Connect your phone to an active wireless
internet connection. OTA (Over the Air) is a
method of updating smartphones wirelessly.
See this guide for details on connecting to a
wireless network.

Open your phone’s settings. You can tap the
Settings icon on your Home screen, or press
your phone's Menu button and select Settings.


4
5
6
7
1
2
3
4
How to Upgrade an Android Device from Version
2.3 to 4.0 Manually
Android smartphones are great devices for a myriad of
different reasons. One of the things that makes them
so great is their software. Upgrades usually occur
periodically, either to fix bugs or introduce new
interfaces and/or updates. Upgrading your phone to
4.0 is a great way to access new set ups in the
software, and doesn't take too long to do.
Method One of Two:
Update Over the Air (OTA)
Connect your phone to an active wireless
internet connection. OTA (Over the Air) is a
method of updating smartphones wirelessly.
See this guide for details on connecting to a
wireless network.
Open your phone’s settings. You can tap the
Settings icon on your Home screen, or press
your phone's Menu button and select Settings.
Tap on "About phone" or "About tablet". This
is located at the bottom of the Settings menu.

Tap on "Software Update" or "System Update".

Tap on "Update" or "Check for system
updates". Your phone will now check the
server for new updates. Once through, if there are
new updates available, a summary of the latest
version will be displayed on a pop-up menu.
Your phone may not be eligible to upgrade to
Android 4.0. It is up to your carrier to make
the new version available for OTA updates.

Install the update. The device will let you
choose whether to “Install Later” or “Install
Now” the updates. Tap “Install Now” to download
and install the update.

Wait for the installation to finish. Your phone
will automatically reboot when the installation
finishes.